I'll start by giving CUbuff4Runner a big thanks in helping me at his dad's sheetmetal shop. There's no way I could have done the tailgate conversion by myself in my garage.
The bonus for swapping tailgate is getting rid of the heavy 4Runner tailgate. You loose all the glass, elec. motor, and all the other stuff in the window to make it go up & down. You also gain 4" of clearance at the bottom of the gate. It makes connecting a bumper to the frame much easier. The negative, you loose the back window. I've only run the hard top 5 months out of the year and don't get much during that time. If it was a daily driver, I probably wouldn't suggest the conversion.
I took some heavy damage to the driver's side rear quarterpanel a couple of years ago running BV Carnage on 33's with no rear bumper. Wasn't the smartest idea I've had

Here's the result of that trip.

Instead of fixing the damage, I just cut out the damage and left it for a couple of years.

The conversion was a good way to get rid of that low hanging quarterpanel and to make it eaiser to connect a bumper to the frame. Here's the pics.

Last picture with the stock tailgate in place. You can see my orange test spots to see what color orange I want to paint it somebody. The passenger side rear quarterpanel has taken some damage over the years as well.

Here's the damaged area that I've covered with cardboard & duct tape to keep the CO fumes from getting inside while running it with the hard top. Nice & ghetto.

Here's the pickup tailgate test fitted. Notice how much trimming has be done on the bottom quarterpanels.

Jeff welding up the 1" by 1" sqaure tubing frame that we used to relocate the hinges. The hidges sit between the 2 supports on each side.

Hinge supports tacked into place on the rear 2" by 3" crossmember I've put in between the rear framerails.

Hinge supports welded in. This shows that rear crossmember better.

Pickup tailgate hung and quarterpanels trimmed.

We welded a bottom piece of sheetmetal to the quarterpanel.

Driver's side was worse since we had to weld in a filler piece of sheetmetal between where I had trimmed and the bottom cap.

Passenger side welded. Just need some seam sealer on the inside and it's done.

Amazing how well the pickup tailgate fits in there.

Just need some paint and a rear bumper.

Driver's side was hard to work on. The Toyota sheetmetal is sooooooo thin. It's hard to weld without blowing holes in it left and right. This side will need some grinding and some bondo to make it look OK (it's not a show car so I'm not worried about it

)

Another picture of th driver's side. The exhaust pipe used to touch the bottom of the quarterpanel. It's now 4" low.

The finsihed product.

Also picked up a 85 front axle housing, wheel hubs, steering knuckles, spindles, and hub bodies as spares from the pull-n-save.

I just reused the stock latches from the pickup. Seemed easier than fab'ing up another solution.

Height difference between the pickup latch vs. the 4Runner latch. I'll just leave the 4Runner latch as another tie down point for the rear.

We used sheetmetal over the 1"x1" frame and just tacked it to the tub in multiple spots. It's plenty strong to stand on.

Close up of the pickup hinge location, sheetmetal, and the orginal hinge location for the 4Runner tailgate.

Just alittle gap that I'll close up. Once I seam seal and heculine the rear, it will look somewhat stock.

Here's the space I gained in the cargo area. It's not much but I'll take as much of it for camping gear as I can get. I've always loved the way 4Runner's looked bob'ed but I use all the cargo room when I go camping so it wasn't feasible for me to bob the rear behind the seats.

Couldn't see the rear frame rails before the trim. Now it's a straight shot. It will make building a rear bumper easier & stronger.

Just sits in the garage 98% of the time.
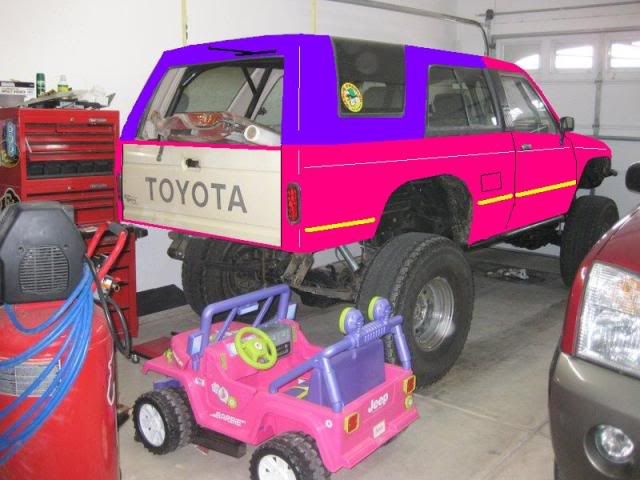
Here's how DIRTCO said I should paint my 4Runner :lof: :lof: