Author Topic: 1989 3vze (3.0 V6) replace water pump and timing belt.  (Read 41047 times)

0 Members and 1 Guest are viewing this topic.

swapped89

  • Offline The 1K Club
  • *
  • Turtle Points: 270
  • Male Posts: 1,221
  • Member since Aug '09
  • Not all who wander...are lost
    • View Profile
1989 3vze (3.0 V6) replace water pump and timing belt.
« on: Jul 21, 2010, 02:36:02 PM »
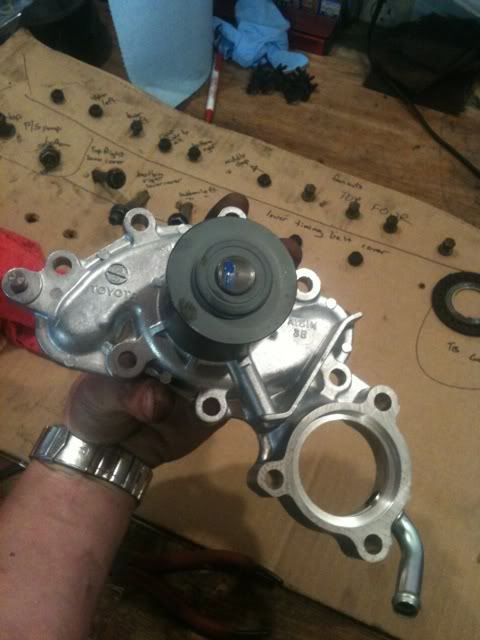
I recently had to replace my water pump because it was leaking pretty bad. The water pump on the 3.o engines is behind the timing belt so i decided I might as well replace it also. I took lots of pictures and will do my best to describe the process. So here we go.
   Also note that I have a K&N cold air intake system so I do not have any of the bulky box stuff around the intake. If you do Im pretty sure you will not have remove any of it.

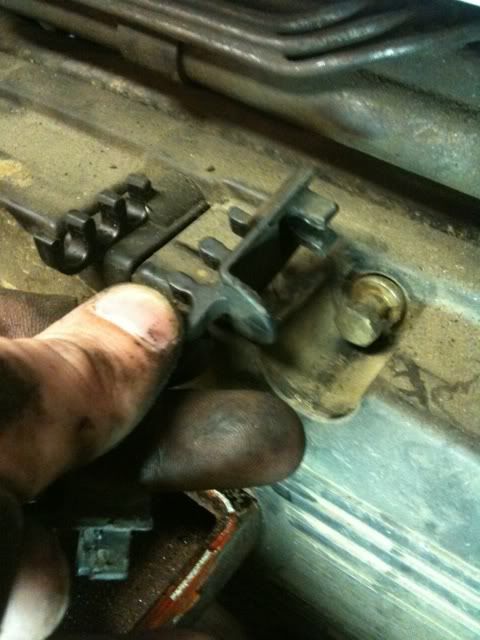
Before I start a project on the engine I usually take a piece of cardboard and punch some holes in it. So i can stick bolts in the cardboard and label them as I go. It makes the process of putting everything back together easier for me. And if you make it in neat order, the holes all empty in a row. Gives me a little re-assurance Im puttin it all back together correctly.  :thumbs:
(cardboard with bolts labeled, in background)


First of all I removed the hood so i wouldnt have to work around the hood "holder upper" (self explanitory no pic)

Next i removed the upper and lower radiator hoses. And then reomove the radiator. You do not have to remove the radiator. I on the other hand DID remove it because later on you need to get a pulley puller on the crank pulley and there was not enough room for my pulley pulling tool with the radiator still in place. You WILL have to remove the radiator shroud.
(no pic of lower hose sorry, lower hose connected to thermostat housing)


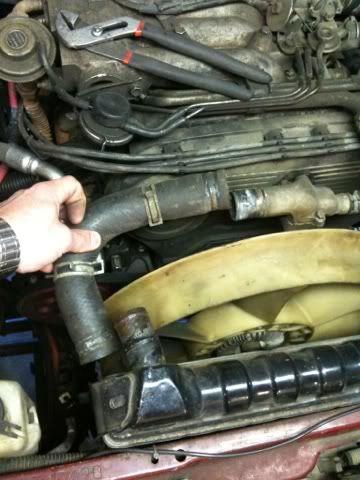
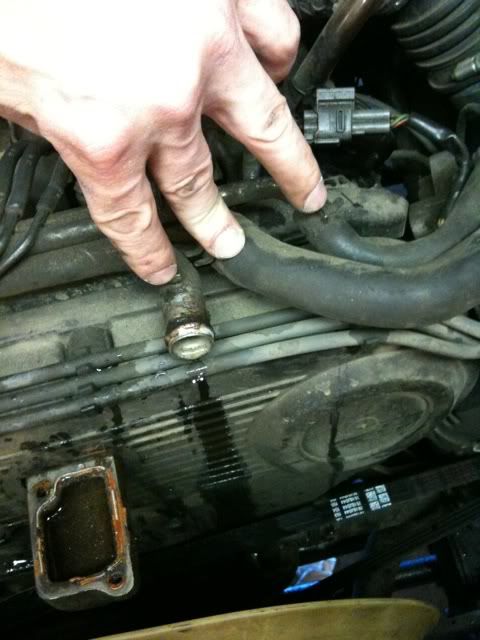
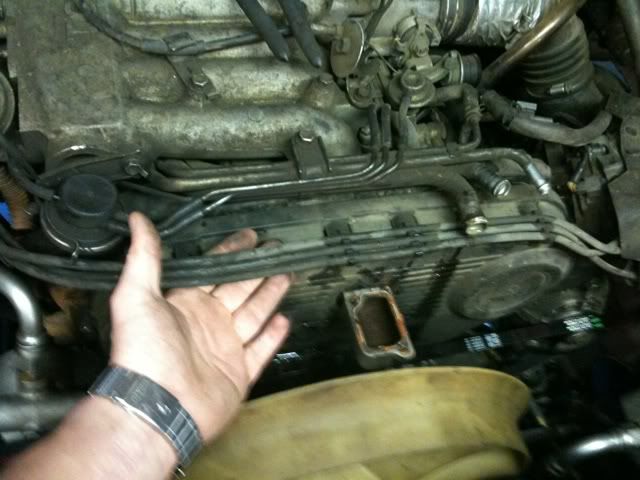
And remove the three hoses indicated by my 3 fingers.  The hoses are 3 different sizes so its not necassary to label them. the one on the left has coolant in it. And the two on the right go to the intake.


Then move the spark plug wires from there clips on top of the Upper Timing belt cover. Also remove the two bolts holding the housing the upper radiator hose was connected to. This needs to be removed so you can pull the upper timing belt cover off later.
 

Next remove the spark plug wire holders on top of the upper timing belt cover. They pry off easily with a flat head screw driver. Underneath them is four bolts you need to remove to remove the cover. Besides thos four bolts there are also 7 more bolts to remove 2 on the left 2 on the right and 3 near the middle. 2 of the three bolts in the middle are recessed and you can only see the holes they are in. Once those are removed you can now remove the upper timing belt cover.


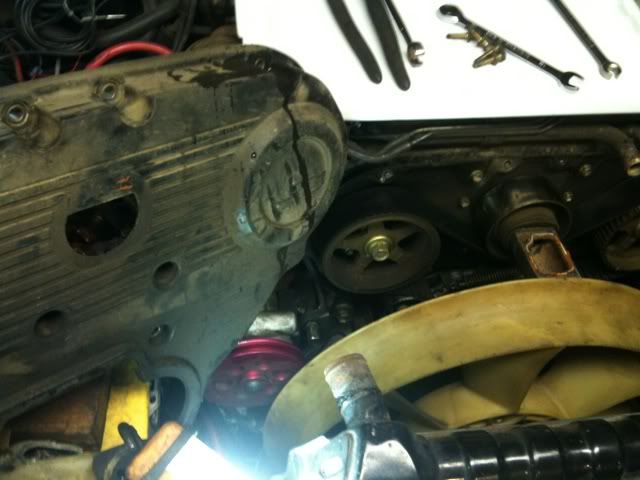
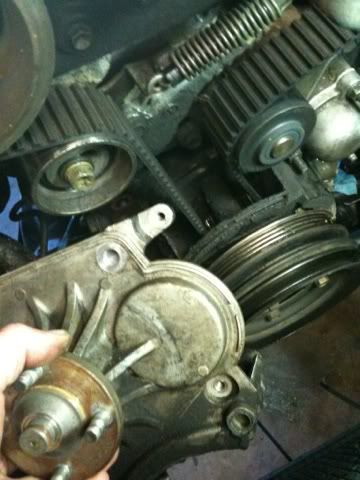
Now you need to remove the power steering belt and the power steering bracket. The bracket is bolted to the motor and also through the middle timing belt cover.
(please note i do not have stock P/S pump)

Next step is to remove the fan and its pulleys. 4 nuts hold the fan and two pulleys in place. I stuffed a rag in between the alternator belt and pulleys to help hold the pulleys in place while i got the nuts loose. (dont remove the nuts just yet, just loosen them) I dont recommend this but i had to hit the wrench with a rubber hammer to create enough force to loosen the nuts. Also note i used a pipe wrench to get more surface area on the nut to lessen the chances of stripping the nut. I would have use the round enclosed end of a combination wrench but it would not fit in place.


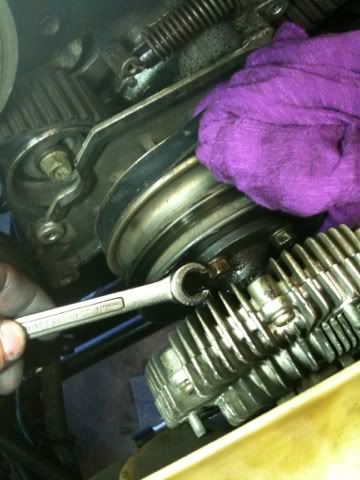
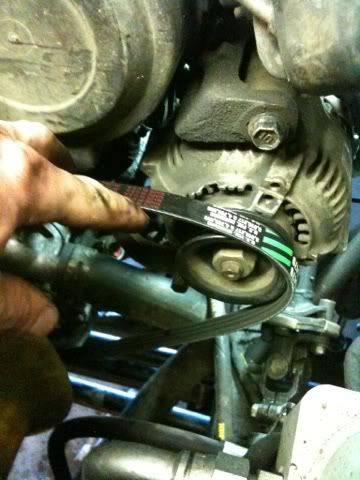
After you break the fan pulley nuts loose remove the Alternator belt.


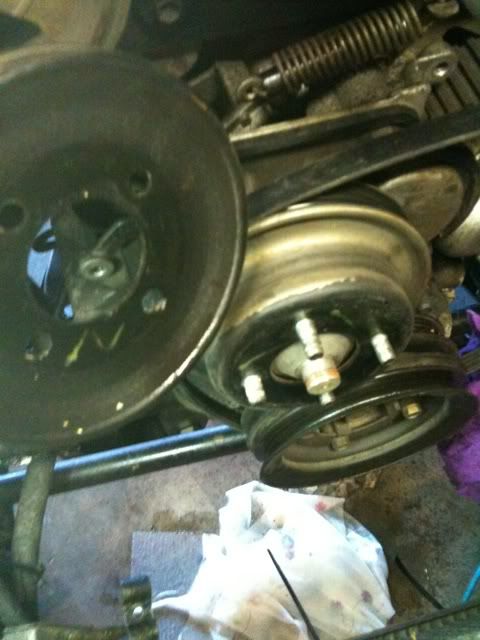
Then remove the 4 fan pulley nuts and remove the fan and two pulleys behind hit. Remember the order the pulleys came off in. It will make installing them easy.


Now remove the housing that the fan and pulleys were attatched to. If you did not remove the power steering pump bracket. You will now know why you need to remove the bracket.


« Last Edit: Jul 21, 2010, 05:56:11 PM by swapped89 »
SAS 89 p/u 3.0 5speed, bobbed, locked, ready to play in the rocks. or wherever the pavement ends :)
http://board.marlincrawler.com/index.php?topic=61345.0 

a wise man listens and observes more so than he opens his mouth.. and when he does it is valuable information....   (twistedtoy92)

swapped89 [OP]

  • Offline The 1K Club
  • *
  • Turtle Points: 270
  • Male Posts: 1,221
  • Member since Aug '09
  • Not all who wander...are lost
    • View Profile
Now its time to check the marks on the crank pulley and the two cam pulleys. All of the marks should line up perfectly
CRANK PULLEY mark set at 0

Left CAM PULLEY

Right CAM PULLEY


Once you are sure everything is lined up remove the crank pulley. The manual sais you need a Special service tool to remove the Crank pulley nut. But I did not have one.
So I put a six sided 19mm socket on my 36" breaker bar. Set the breaker bar on TOP of the DRIVER side frame rail. NOW REMOVE the COIL WIRE SO YOUR MOTOR DOES NOT ACTUALLY START.  Put the socket on the crank pulley bolt, and crank the motor over for a second. Since the motor spins clockwise this will loosen the crank pulley bolt.  It is scary to do, and i do not recommend this method. The bolt will need to be torqued back on during installation at 181ft lbs.
 
Now that that crank pulley bolt is loose/removed you can use a pulley pullinng tool to remove the crank pulley. I had to find another longer bolt that matched the crank pulley bolt for my pulling tool to work. After the pulley is removed there is a big cupped washer lookin thing it is the "timing belt guide". The cupped side faces outword to the front of the vehicle.


Now remove the lower Timing Belt cover.


Now the front of your Motor should look like this. Now you can see the power steering pump and Timing belt in all its glory.


more to come later.... :beerchug:
« Last Edit: Jul 21, 2010, 05:05:56 PM by swapped89 »
SAS 89 p/u 3.0 5speed, bobbed, locked, ready to play in the rocks. or wherever the pavement ends :)
http://board.marlincrawler.com/index.php?topic=61345.0 

a wise man listens and observes more so than he opens his mouth.. and when he does it is valuable information....   (twistedtoy92)

swapped89 [OP]

  • Offline The 1K Club
  • *
  • Turtle Points: 270
  • Male Posts: 1,221
  • Member since Aug '09
  • Not all who wander...are lost
    • View Profile
After the you have removed the crank pulley and lower timing belt cover check the marks on both cam pulleys and on the crank's timing belt pulley. Make sure they are still lined up. If not rotate the motor clockwise. Until the marks all line up
(picture of marks on crank/timing belt pulley)


Next is to remove the spring from the T/B tensioner.


Then loosen the timing belt tensioner bolt. Slide the tensioner all the way to the left.
 Then snug the bolt.

 Now you can remove the timing belt. Remember to mark the belt before removing it. If you plan on re-using it. And never crimp or flex the timing belt or turn it inside out.

Now you have the timing belt removed and can begin removing the water pump.


After the water pump is removed

clean the surface of the engine to prepare for it's new gasket and water pump :)


there are torque specifications for the water pump bolts. Some ar 13ft lbs. And some are 14 ft lbs. I just tightened them by feel. Remember to check all your pulley marks once your timing belt is in place. And remember to re-tighten the timing belt tensioner. It's a good idea to turn the motor a couple times (clockwise) with a wrench on the crank pulley bolt, to make sure your marks are all still lined up after the timing belt is installed.
 

now all you have to do is put it all back together in the revers order that you took it apart. I hope this helps anyone that needs to familiarize themselves with the process before starting. It can seem over whelming but it's actually not hard to do. Just takes time.
« Last Edit: Jul 21, 2010, 05:59:49 PM by swapped89 »
SAS 89 p/u 3.0 5speed, bobbed, locked, ready to play in the rocks. or wherever the pavement ends :)
http://board.marlincrawler.com/index.php?topic=61345.0 

a wise man listens and observes more so than he opens his mouth.. and when he does it is valuable information....   (twistedtoy92)

junya92toy

  • Offline The 1.5K Club
  • **
  • Turtle Points: -64
  • Male Posts: 1,500
  • Member since Nov '04
  • Drinking me beer
    • View Profile
Replace the  T stat, replace both tensioners, do it all at once. Use only toyota parts.
Dr.Maxwe001 – well i have a 15 gal compressor now and if I gett he 60  and then use the 15 as a reserve that wil give me 75 gal  thats close to 80 isnt it ?

46&2

  • Hillbilly
  • Offline Gold Turtle Award
  • *
  • Turtle Points: 8
  • Male Posts: 4,834
  • Member since Dec '05
  • California livin'
    • View Profile
Nice write up man. Thanks for doing this.  :beer:
85 4Runner Build  /  Cool Foreign Toyotas  /  Toyota: We Want Diesel FB Page    Rockcrawlintoy – i guess moms will put the pups up on the beach when they go fisting

swapped89 [OP]

  • Offline The 1K Club
  • *
  • Turtle Points: 270
  • Male Posts: 1,221
  • Member since Aug '09
  • Not all who wander...are lost
    • View Profile
Nice write up man. Thanks for doing this.  :beer:
Fo Sho!!  :) glad it may have helped someone :cool:
SAS 89 p/u 3.0 5speed, bobbed, locked, ready to play in the rocks. or wherever the pavement ends :)
http://board.marlincrawler.com/index.php?topic=61345.0 

a wise man listens and observes more so than he opens his mouth.. and when he does it is valuable information....   (twistedtoy92)

Nick1221

  • Offline Dusty Trails
  • *
  • Turtle Points: 3
  • Posts: 1
  • Member since Nov '12
  • Crawling with Marlin
    • View Profile
I know this topic hasn't been posted in for a while, but I just wanted to thank you for posting this! I printed it out and laid it on the plenum and followed it throughout the entire process! Everything went perfect and she started right up! Feels good having the 'yota back on the road!

 :thumbs:

92TOYPU

  • Offline Dusty Trails
  • *
  • Turtle Points: 0
  • Posts: 1
  • Member since Nov '23
  • Crawling with Marlin
    • View Profile
Hi,

I have the 3VZ-E engine.  I just replaced the fan clutch bearing bracket and I'm working on the timing belt.

Can anyone please share the torque specs for the two (2) alternator bolts? 

Thanks

sirdeuce

  • Offline Crawler Guru
  • ****
  • Turtle Points: 1138
  • Male Posts: 534
  • Member since Sep '06
  • One shot, one kill.
    • View Profile
It's a secret.
Brought to you by the WBC (World Billionaire's Club) because money is a bad thing. Let us carry that burden for you.

Sure it'll fit........ Just needs a little brute finesse.

Sure I believe intelligent life exists on other planets. Other planets, not this one.

RUGER

  • Offline The 1K Club
  • *
  • Turtle Points: 16415
  • Male Posts: 1,017
  • Member since May '02
  • I love Marlin Crawler!
    • View Profile
    • Buy me a beer
 ??? snug with a tug ???

RUGER
:usa: GOD BLESS AMERICA :usa:

"the hag" 83 toy with 5" all-pro lift, marlin crawler dual case #1011 and marlin hy-steer, 35s, 5.29's, exo cage, yada, yada, yada. she's back in black.

97 F250
84 Grand Waggy
77 Scout II SS
96 Explorer Sport
20 F150

USN SEABEE 2008-2012 :usa:
run with THE PACK 4wdc of los osos
NRA life member


Related Topics

1 Replies
2076 Views
Last post Jun 20, 2006, 09:32:30 AM
by Mike D
4 Replies
2411 Views
Last post May 13, 2007, 12:41:05 PM
by Cheesemaker
10 Replies
5610 Views
Last post Oct 16, 2007, 12:24:11 AM
by yota_krawler
15 Replies
4200 Views
Last post Jun 29, 2008, 06:51:20 PM
by 79coyotefrg
4 Replies
835 Views
Last post Nov 14, 2021, 12:20:14 PM
by busmup808