Here come some installation detail pictures from our first prototype with my Tacoma
My suspension was removed because I was in the middle of
installing my second V2 RCLT Prototype. Otherwise I could have left all suspension components installed and just welded the new Marlin Crawler HD Brace Kit parts on.
This info will be included in the Installation Guide, but if you're worried about heat affecting your bushings, then just do one bead of weld per LCA mount at a time, misting some water to help with cooling.
More on this is that (1) the majority of the welding is done away from your bushings, (2) our HD parts are very thick and absorb most of the heat, such that (3) heat transfer to your bushings is not a big concern. In fact, the original Toyota frame paint on my factory cam plates and inside face of each flange didn't even melt off.

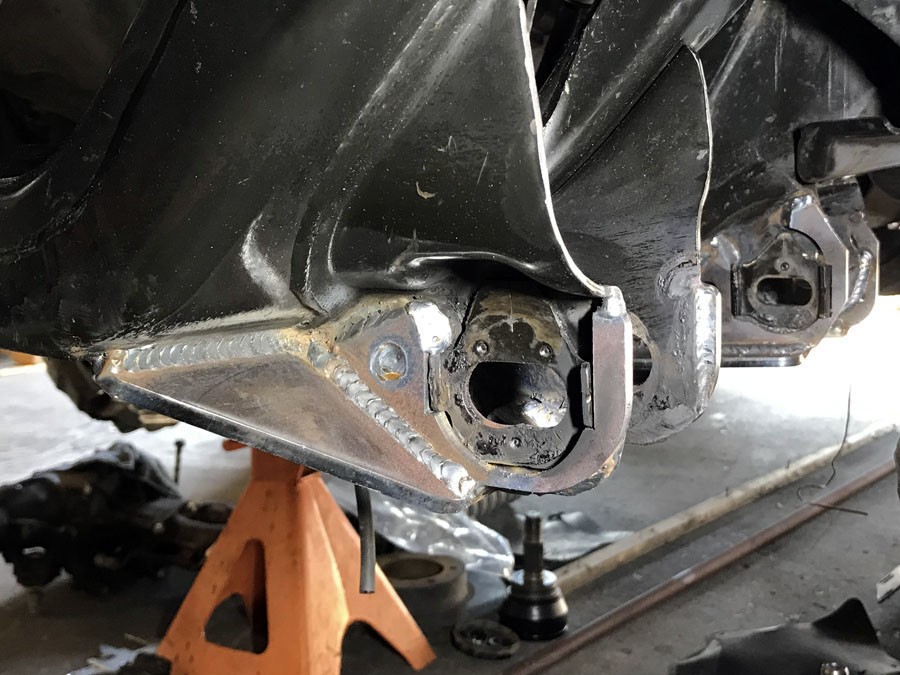
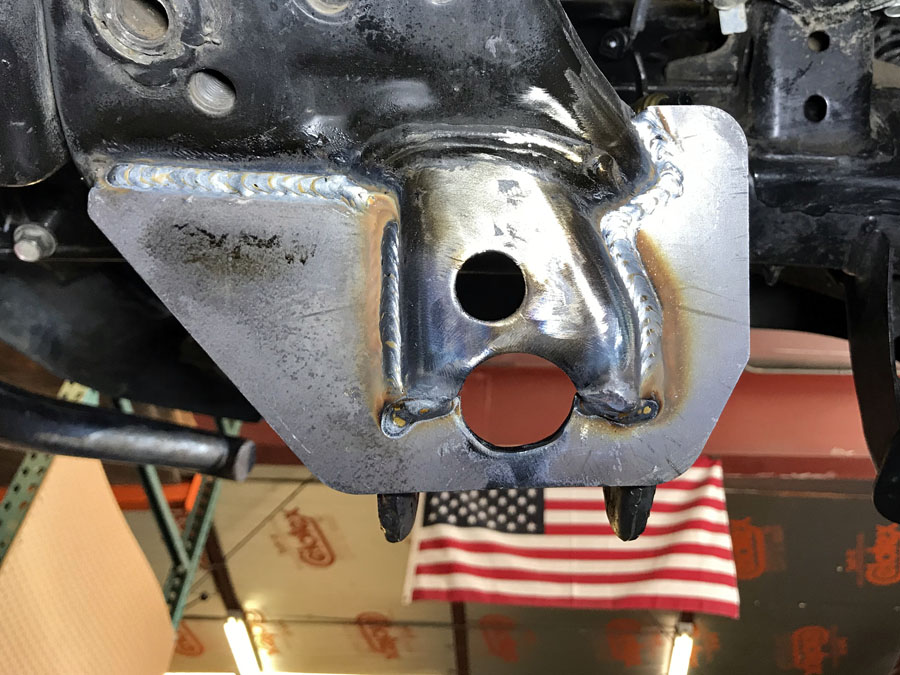
Close-up of the angled front LCA gusseting with Uprights encompassing factory cam tabs
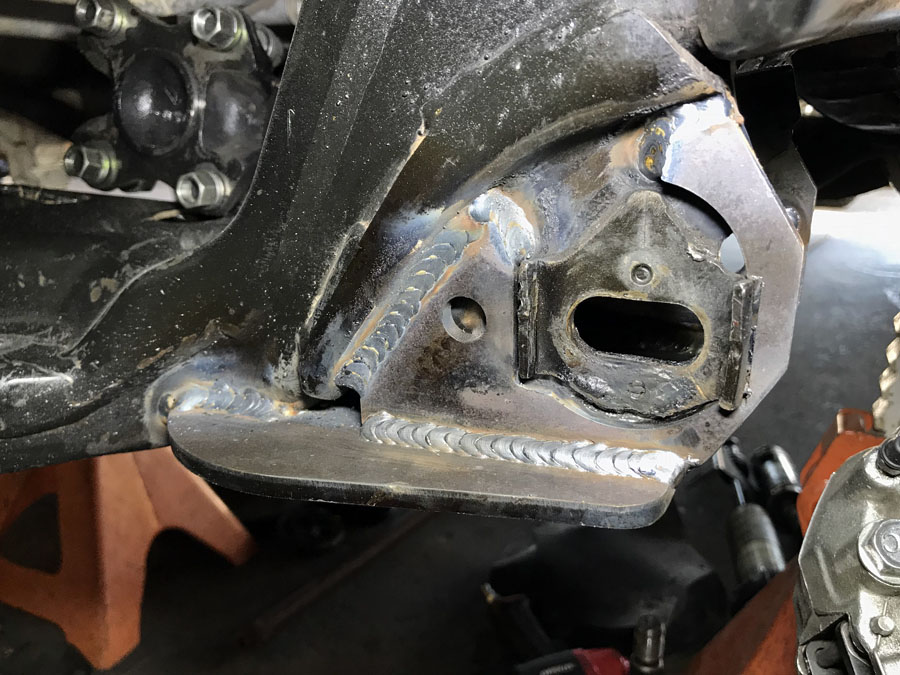
Close-up of the rear LCA gusseting with Uprights encompassing factory cam tabs.
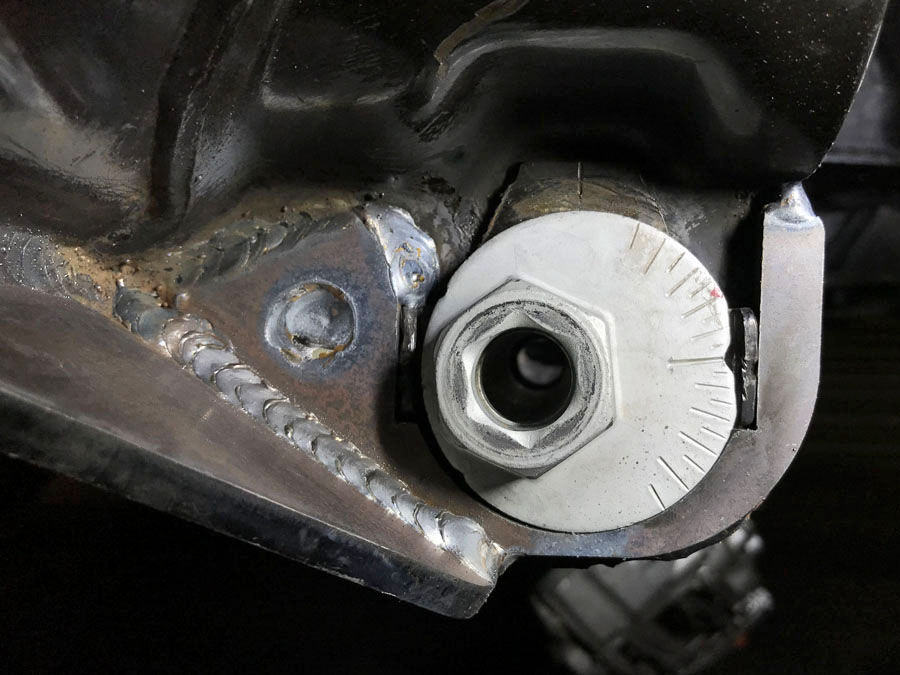
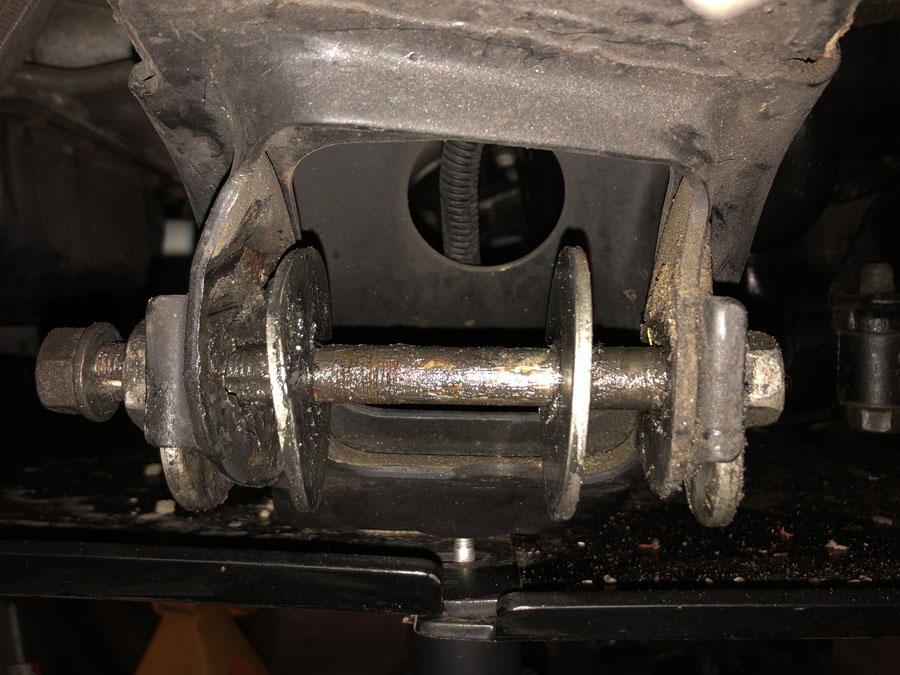
Here is what a cam eccentric looks like installed. Depending on the position of your hardware, our HD Uprights add additional support around the indexed flange, spreading the load across a surface far greater than only just the cam tabs.
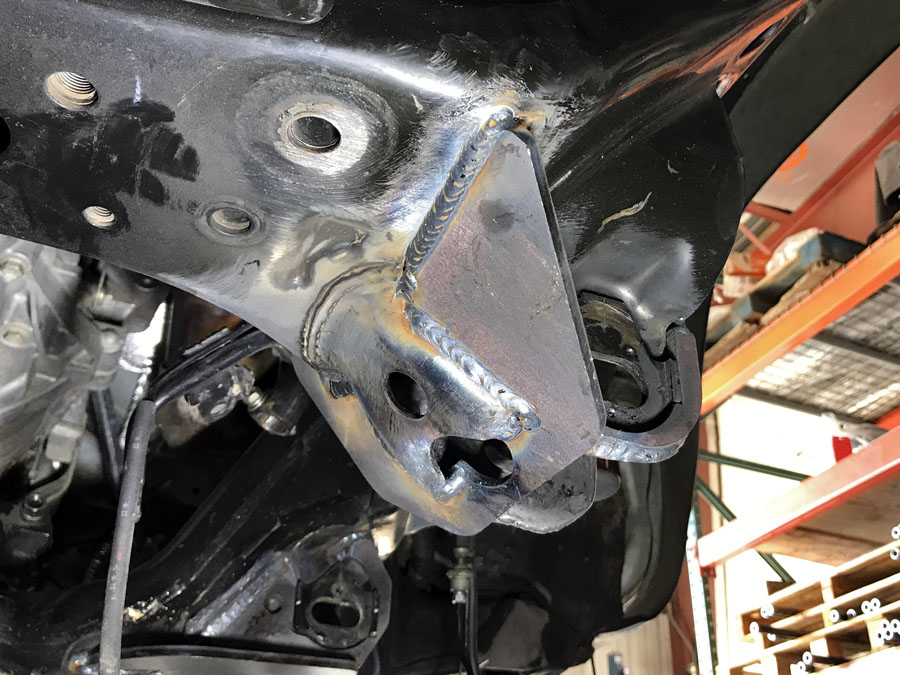
And finally, a couple pics showing the
massive strength increase to your LCA mounts!
-------------------
EDIT: I forgot to include the carnage picture of the bent rear LCA mount from the King Of the Hammers 4Runner. This is their passenger side rear LCA mount. Both flanges bent rear-ward (left in this view) pretty badly, and for sure our HD Brace Kit would have prevented this!
-------------------
Click here for product pricing and details: https://www.marlincrawler.com/armor/axles/front-axle-armor/heavy-duty-lca-frame-brace-kitRegards,
BigMike


