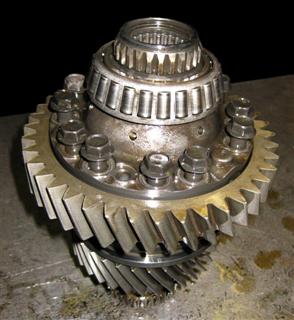
Next, we'll replace the center differential's low speed gear.
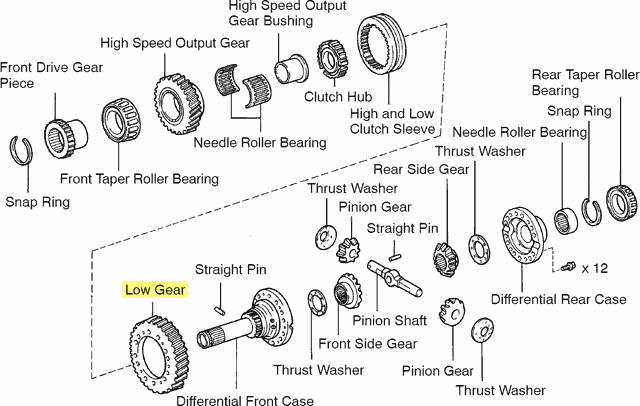
Begin by removing the 12 bolts from the differential, and remove the differential's rear case. We won't have to worry about the rear tapered roller bearing since it it pressed onto & remains on the rear case. With the rear case removed, the pinion shaft, gears, and rear side gear are exposed. Remove the rear side gear and set it aside. The pinion shaft has two pinion gears and two thrust washers attached to it. Remove the shaft, gears, and shims, keeping them all together. Tip: Due to the pinion shaft's pin, it can only be installed in one orientation. You therefore do not need to mark the shims (so long as you keep everything together), however, it is good practice to mark which side of the pin is facing the rear cover. Tip: You must keep each thrust washer with their own pinion & side gears -- do not mix them up!
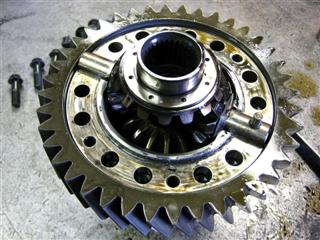
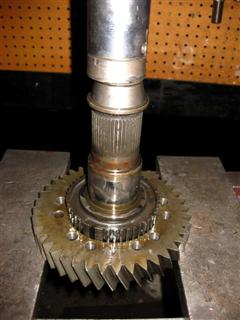
Flip the differential assembly over and remove the snap ring from the front drive gear. We are now ready to press the front tapered roller bearing from the front differential case.
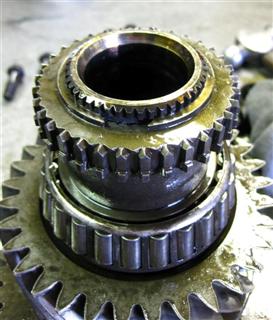
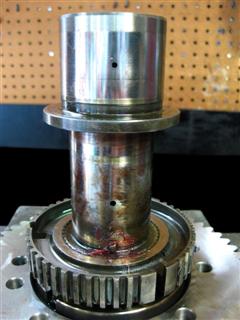
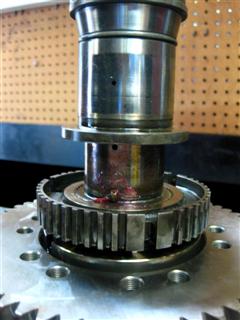
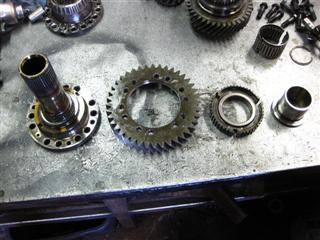
Using a bearing splitter, press the shaft of the front differential case through the center of the front tapered roller bearing by supporting the assembly on the bottom side of the shift hub (similar to before). The front drive gear, roller bearing, high speed output gear, needle roller bearings and shift hub will all be removed during this process. Lastly, press off the high speed output gear bushing by supporting the low speed gear in your press. With the bushing removed, the clutch hub and low speed gear may be removed. Tip: Mark the top sides of both the shift hub and the clutch hub to ensure they are reinstalled properly. Tip: Remove the small shaft pin at this time to prevent misplacing it.
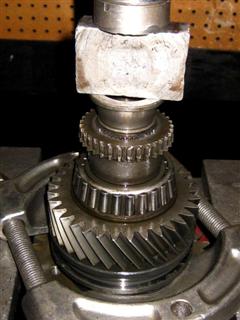
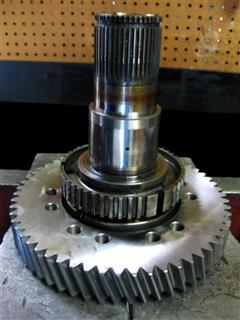
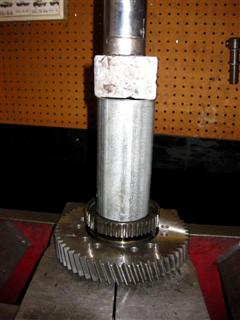
Replace the stock 40-tooth low speed gear with our 58-tooth Marlin Crawler low speed gear. Press the clutch hub back onto the front cover shaft, noting which side you marked facing up.
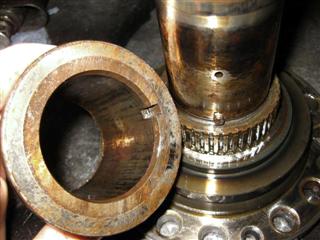
With the hub back on, apply grease onto the small shaft pin and install it back into the shaft (the grease will keep the pin from falling out). Before pressing the output gear bushing back on, it is important to note the alignment between the front case shaft pin and the slot on the output gear bushing. If the bushing is not properly aligned at the beginning of the pressing process, it will interfere with the shaft pin and you'll have to press it back off and start over. The best way to align the bushing is to align the two oiling holes before pressing the bushing on, as shown in the following close up photos.