This Thread is Featured in our Tech from our Forum Members section!
After installing V-6 IFS calipers, and an 89 rear axle with larger drums, it was obvious that I also needed to upgrade to the larger, 1" master cylinder. The stock master, I think it's 3/4", just couldn't push enough fluid into the larger brakes, and I think there was a problem with mine anyway because the brakes always felt spongy, even before the larger calipers and drums were installed. I also decided this was a good time to install a rear brake proportioning valve that I could manually adjust, opposed to the ugly, poorly adjusted stock proportioning valve that attaches to the rear axle and frame, and may or may not have been working correctly. Here's whatcha do...
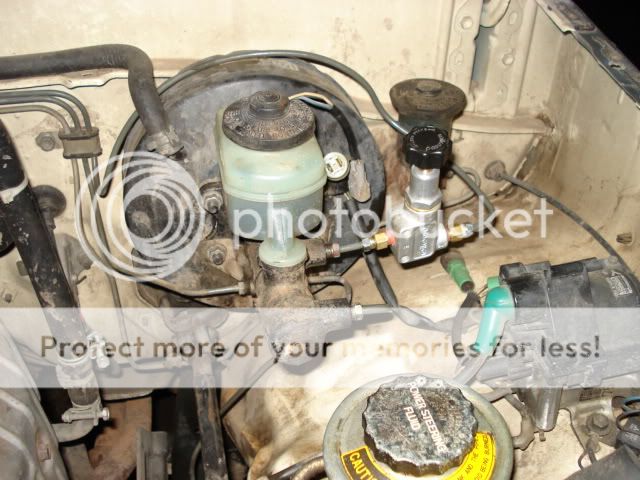
Remove old master cylinder. You can see here that the stock one (on the right) is definitely smaller than the 1" bore master I got from my old 89 parts truck...

Next, install the new 1" bore master cylinder. I chose to use a thin layer of ultra gray permatex instead of the actual gasket, and I greased the plunger where it contacts the brake booster push rod. You will see that I used some old brake lines and some old vacuum hoses to make an at-home master cylinder bleed kit. It is very important to fully bleed the master cylinder or you will forever be chasing bubbles in the system. To bleed the master install the 2 hoses as shown (front hose is for the front brake line, rear is for the rear), insert into reservoir, fill with (new) fluid, and slowly pump brakes about 10 times.

Now it's time to attach the real brake lines where the bleed lines are. Make sure the reservoir is topped off because some fluid will slowly drip out, but not too much. If you are only doing the 1" master, and not adding the proportioning valve, just connect the lines in their stock positions. If you are installing a proportioning valve, this is where it gets a little tricky. Wilwood uses fittings that are 3/8 24 thread, but Toyota uses 10mm by 1.0 thread pitch. They are very similar, but not the same. You have to cut off the stock 10x1.0 fittings with a small pipe cutter and install some 3/8x24 fittings, then using a DOUBLE flaring tool re-flare the lines. The flaring is very important. You have to use a double flare for long-term durability, and it is imperative that the flare be cleaned of all burs before attaching the lines to the proportioning valve, or the connection will leak. I suggest practing using the double flaring tool on some scrap brake line before trying on the actual line you intend to use. When it's all said and done, it's very clean, and well worth the effort.

Starting in 1984 (the year of my truck) Toyota added a secondary return brake line that I actually don't know what it does, but it's part of the original proportioning valve. This line can be removed completely. You will see where it Ts off on the passenger side frame rail. Just cut and remove as much of this line as possible. If you want to "professionally" remove all the line you will have to lift the cab off the frame, which I wasn't about to do. What you want to achieve is one direct line running from the master cylinder to the rear axle, and one line from the master to the front axle. Now, of course, these lines will be split into left and right wheels (discs front, drums rear). The T for the rear split is on the axle, and the T for the front split is just below the master cylinder. Here's a few pics of how I chose to bypass the secondary return line. You can see that my rear line is attached to the frame with the L fitting on the left, and my front, right brake line completely bypasses the stock T fitting all together and runs straight into the caliper, it's zip tied to the shock hoop. This is much easier once you get into it.


Now all you have to do is bleed the calipers, and enjoy the best braking you've ever felt in a lifted and abused Toyota rock crawler. Best part, this all cost under $100, I did it in my front yard, no special tools were needed except maybe the double flare tubing tool, but that was only $20. Feel free to ask questions, and I'll try to help out where I can.
Wilwood Proportioning valve $42
1" bore master cylinder $free (from my old parts truck, about $60 if you buy a new one)
Double flaring tool $20
3/8 x 24 fittings for 3/16" brake line $1.65 for 2
brake fluid $5
roll of shop towels $3
Insane braking Priceless!!!!!!!!!
Note, I have since learned a little more about brake systems, and the zip-tied hardline to the shock is long gone. Hard mounts are much cleaner, and safer, and should always be used.


